In the last few years I have done quite some programming work with Python and started to love both the Anaconda distribution (I might do another blog-post on that topic) and the Spyder IDE. If you are very new to Python and programming, this might be a little overkill, but it will be a very clean basis to start with and no drama, once there is the need to update or upgrade. So follow these steps if you want to get a first quick-start into Python with using the Spyder IDE and Anaconda.
Getting Anaconda
Grab the latest Anaconda distribution from https://www.anaconda.com/distribution/ and install it. At the time of writing this, Python 2 is close to its end-of-support and so I highly advise to get the distribution bundled with Python 3, however you can still easily switch between Python versions using Anaconda environments. During installation, I recommend to leave the default options when it comes to adding Anaconda to the path (Default = No) and registering Anaconda’s Python as the system’s standard Python distribution (Default = Yes). If you need help installing Anaconda, more information can be found here.
Creating an environment
Anaconda manages different Python versions and compatible versions of packages, so that you can easily switch between versions and everything will still be compatible. To get started, pick a name for an environment and create that environment with the desired Python version. To do that, open up an Anaconda prompt. In windows, you can do that simply from the start menu.

In this window, you will see a command prompt, with the name of the environment you are working on in the front. In the image above, we are working in the default environment, called base. To create a new environment with the name my_environment, which already has the newest Python and Spyder versions installed you issue the command:
conda create -n my_environment python spyderAfter issueing that command, Anaconda tries to solve dependencies automatically and presents you a list of packages it is going to install. Confirm this list with yes. After installation, Anaconda will tell you the commands to activate and deactivate your newly created environment, in this case it will be:
conda activate my_environmentFirst steps with Spyder
Once you are done installing your environment make sure to activate it using the command above. You should see the name of your environment now at the beginning of your command prompt. Simply issue the command spyder and you should see the Spyder IDE loading. Once started, Spyder should look like this (I’m using the dark color scheme, so yours might be a little brighter):
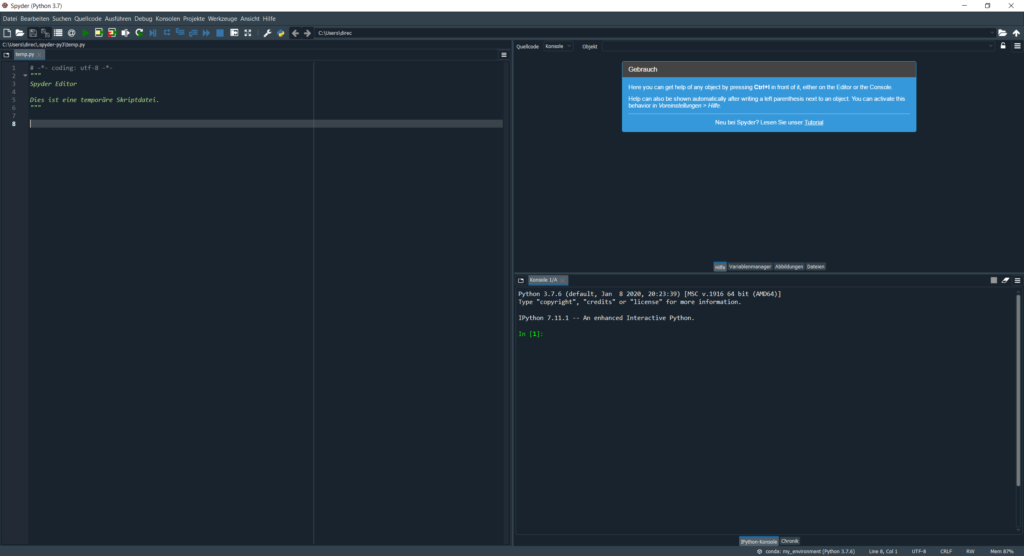
On the left you have the editor window, where you can write/edit and save code in Python files (*.py). On the bottom right, you have an interactive console (IPython), where you can run simple lines of code from the editor or you can type code directly there. Try something simple, like entering
1+1and pressing the Enter key. The result of your input is presented and the console returns back to a new command prompt. No tutorial is complete with the „Hello World“ example, so this will be the last thing we will be doing.
Hello World
Inside the editor, type the line
print('Hello World')and save the file somewhere you can find it again. Press F5 to run the file in the interactive interpreter. The first time you do this, Spyder might ask you what kind of behaviour you want, I’m happy with the defaults. You should see the famous words Hello World printed in the console. Congrats! You’ve got a working IDE inside a very simple Anaconda environment!